

Have you ever wondered about the best way to prepare nectar for your backyard hummingbirds? If so, you’re not alone. The debate over whether to boil homemade hummingbird nectar has puzzled many bird enthusiasts. This guide will explore the pros and cons of boiling your hummingbird food recipe. By the end, you’ll be able to make an informed decision that ensures these tiny, vibrant visitors keep coming back to your garden.
The Basics of Hummingbird Nectar
Before we dive into the boiling debate, let’s cover the basics of hummingbird nectar.
What is Hummingbird Nectar?
Hummingbird nectar is a simple sugar solution that mimics the natural nectar found in flowers. It provides these high-energy birds with the 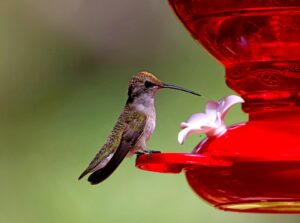 quick fuel they need for their fast-paced lifestyle. The basic recipe is straightforward: a mixture of sugar and water.
Why Homemade Nectar?
Many bird lovers prefer to make their own nectar rather than buying pre-made solutions. There are several good reasons for this choice. First, homemade nectar is more cost-effective. You can make large quantities for a fraction of the price of store-bought options. Additionally, when you make it yourself, you know exactly what’s going into the nectar. This means you can avoid any unnecessary additives or preservatives. Finally, homemade nectar is always fresh, which is crucial for the health of the hummingbirds visiting your feeder.
The Great Debate: To Boil or Not to Boil
Now, let’s address the central question: should you boil the water when making hummingbird nectar? This topic has sparked much discussion among bird enthusiasts and experts alike. Let’s explore both sides of the argument.
The Case for Boiling Hummingbird Nectar
Many people swear by boiling their hummingbird nectar. Here’s why:
-
Sterilization: Boiling water kills harmful bacteria and other microorganisms. This is especially important if your water source isn’t completely pure.
-
Longer shelf life: Nectar made with boiled water tends to stay fresh longer. This can be helpful if you make large batches at once.
-
Better dissolution: Sugar dissolves more quickly and completely in hot water. This ensures a consistent sugar concentration throughout the solution.
-
Peace of mind: For many, the act of boiling provides reassurance that they’re providing the safest possible nectar for their hummingbird visitors.
If you choose to boil your nectar, here’s a step-by-step guide:
-
Measure out four parts water to one part white granulated sugar.
-
Bring the water to a rolling boil in a clean pot.
-
Remove from heat and stir in the sugar until it’s completely dissolved.
-
Allow the mixture to cool to room temperature.
-
Fill your clean feeder and refrigerate any excess.
Remember, never add honey, artificial sweeteners, or red food coloring to your nectar. These can be harmful to hummingbirds.
Making hummingbird nectar
The Argument Against Boiling
On the flip side, many experts argue that boiling isn’t necessary and may even be detrimental. Here’s their perspective:
-
Potential harm: Some studies suggest that boiling water with sugar can lead to the formation of harmful compounds. These might not be good for hummingbirds in the long run.
-
Time-consuming: Boiling and cooling take time. If you’re short on time, this extra step might discourage you from changing the nectar as often as you should.
-
Energy waste: Boiling water uses energy. If you’re environmentally conscious, you might prefer a method that doesn’t require this extra energy use.
-
Unnecessary in most cases: If you’re using clean water from a reliable source, boiling may not provide any significant benefits.
Those who advise against boiling suggest this method instead:
-
Mix four parts room temperature water with one part white sugar.
-
Stir until the sugar is completely dissolved.
-
Fill your clean feeder and refrigerate any excess.
Some also recommend using very hot tap water to help the sugar dissolve more easily, without bringing it to a full boil. I personally find that using hot tap water is enough heat to easily dissolve the sugar.
Best Practices for Safe Hummingbird Nectar
Regardless of whether you choose to boil or not, there are some universal best practices to follow: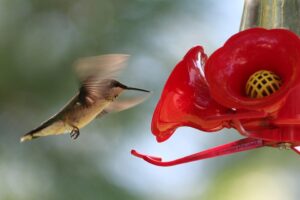
-
Clean feeders regularly: Wash your feeders with hot water and a mild detergent every time you refill them. Rinse thoroughly.
- Click on the link for a detailed guide to help you clean your hummingbird feeder, especially when mold starts to grow due to nectar not being changed in time.
-
Change nectar frequently: In hot weather, change the nectar every 2-3 days. In cooler weather, twice a week is usually sufficient.
-
Guide for when to change the nectar
Letting the nectar ferment encourages mold growth, which makes the cleaning process more difficult. To avoid this, follow the chart below for recommended nectar changes based on the temperature. The hotter it gets, the more frequently you’ll need to replace the nectar.
High temperatures…………Change after
71-75……………………………6 days
76-80……………………………5 days
81-84……………………………4 days
85-88……………………………3 days
89-92……………………………2 days
93+………………………………change daily
-
Watch for signs of spoilage: If the nectar looks cloudy, has black spots, or smells fermented, discard it immediately and clean the feeder.
-
Use the right sugar-to-water ratio: The ideal concentration is 1 part sugar to 4 parts water. This closely mimics the sugar content of natural flower nectar.
-
Avoid red dye: It’s unnecessary and potentially harmful. The red color on your feeder is enough to attract hummingbirds.
Environmental Considerations
When preparing hummingbird nectar, it’s important to consider the broader environmental impact.
Impact on Hummingbird Health
While we don’t have definitive long-term studies on the effects of different nectar preparation methods, we do know that clean, fresh nectar is crucial. Natural flower nectar is always best, but well-prepared homemade nectar is a good substitute when flowers are scarce.
Sustainable Practices
Consider these eco-friendly tips:
-
Use glass or high-quality plastic feeders that will last for years.
-
Plant native, nectar-producing flowers in your garden to provide natural food sources.
-
If you don’t boil your nectar, use that saved energy to research and implement other ways to support local hummingbird populations.
Frequently Asked Questions
To wrap up, let’s address some common questions about hummingbird nectar:
Q: Can I use honey instead of sugar in hummingbird nectar?
A: No, honey can promote dangerous fungal growth. Stick to plain white sugar.
Q: How often should I change the nectar in my feeder?
A: Change the nectar every 2-3 days, or sooner in hot weather.
Q: Is it safe to use brown sugar or artificial sweeteners?
A: No, use only plain white sugar as it’s closest to natural flower nectar.
Q: Do I need to use distilled water?
A: If your tap water is safe for you to drink, it’s generally safe for hummingbirds. However, if you’re concerned about impurities, you can use distilled water.
Q: Can I make a large batch of nectar and store it?
A: Yes, you can store extra nectar in the refrigerator for up to two weeks. However, always discard it if it shows any signs of spoilage.
Conclusion
In the end, whether you boil your homemade hummingbird nectar or not, the most important thing is to provide a clean, safe, and consistent food source for these amazing birds. Consider your local climate, time constraints, and the latest research when making your decision.
Remember, the joy of attracting hummingbirds to your garden far outweighs the minor debate over nectar preparation methods. By providing fresh, clean nectar and maintaining your feeders properly, you’re helping these incredible creatures thrive.
So, keep those feeders filled, plant some nectar-rich flowers, and enjoy the delightful hum and flash of colors as hummingbirds visit your garden. Your efforts in providing a safe haven for these tiny marvels contribute to their conservation and bring a touch of natural wonder to your daily life.
Happy hummingbird watching!
Valuable Hummingbird Resources
Here’s a complete guide to attracting hummingbirds to your yard. It lists plants, vines and shrubs that are in bloom for spring, summer and fall. Your hummingbirds will always have flowers to feed on.
Here’s a great article that tells everything you need to know about how to choose the best place to hang your hummingbird feeder.
Here’s the best designed hummingbird feeder to use. It’s leak proof, so it won’t attract insects and it’s easy to take apart and clean.
Here’s a comprehensive guide to help you clean your hummingbird feeder for those times when the nectar is not changed soon enough and mold starts to grow.
Here is a detailed article on the easy way to keep ants and bees off of your hummingbird feeder
If you found this article helpful please share it with your friends using the social bookmarking buttons on the left side of this page. Help everyone to increase their knowledge and enjoyment of feeding hummingbirds. Do it for the hummingbirds! It also helps my ranking so my information will be available to more people. The more people that see this vital information, the more the hummingbirds are helped. Thank for your help. The hummingbirds and I appreciate you very much!
