Hummingbird Recipe To Fill Your Hummingbird Feeder
Here you will learn how to make hummingbird nectar, when to change the nectar in your feeder, how to properly clean your feeder, how to keep bees, ants and wasps away from your feeder and at the bottom of this article you will find my video that will also teach you how to hand-feed your hummingbirds.
The hummingbird feeder recipe is 4 parts water to 1 part sugar.
Easy directions for making hummingbird food:
- In a sauce pan mix 1 part sugar with 4 parts water and stir to dissolve the sugar as the food mixture comes to a boil.
- Boil 2 minutes, then remove from the heat.
- Once the nectar mixture is cooled you can fill the feeder
The ingredients are ordinary tap water and white granulated table sugar. No other ingredients are added. Don’t use brown sugar, honey, corn syrup, molasses or artificial sweeteners. The flower nectar that hummingbirds feed on contains sucrose (ordinary table sugar) and that is all that is needed. Other ingredients can prove to be harmful or even fatal to the hummingbirds, so don’t use anything but white table sugar. Do NOT add red food coloring! Food coloring is considered to be harmful to hummingbirds so don’t add it.
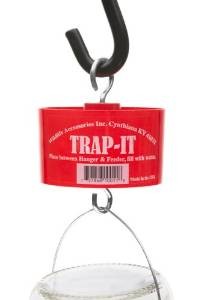
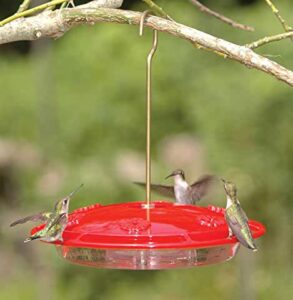
A red feeder is all you need to attract the hummingbirds. Do not use red food coloring in the nectar, it may be harmful to hummingbirds and it isn’t necessary.If your feeder is not red you can tie strips of red ribbon to your feeder or add a red hummingbird feeder ant moat between the hanger and the feeder. A red ant moat will help attract hummingbirds and will also keep ants out of your feeder.

The nectar mixture is boiled so that the chlorine in the water will be released and any mold or bacteria that might be in the sugar will be killed. This will help your nectar last longer in the feeder and in storage. You can store leftover nectar in the refrigerator for up to 2 weeks. Boiling your homemade hummingbird food for 2 minutes is long enough. Boiling any longer will boil away more water and change the composition of the nectar. The 1 to 4 ratio of sugar to water is the same ratio found in flower nectar. If you boil longer it will change the ratio and make the nectar sweeter This will also make it more attractive to bees and wasps.
Any ratio of 1 to 4 will work. For example, you can use 1 cup sugar to 4 cups water or 1/2 cup sugar to 2 cups water or 1/4 cup sugar to 1 cup water … etc. These are all examples of a 1 to 4 sugar to water ratio. If you make a larger batch of hummingbird nectar, you can keep it in the refrigerator and not have to make it as often.
Video: making hummingbird food
Where to hang a hummingbird feeder
Once your hummingbird food is made and your feeder is filled you will have to find a place to hang the feeder. It’s best to find a shady spot to place your feeder if possible. The nectar will stay cooler and stay fresh longer if it’s in the shade. If you must hang it in the sun, that’s alright, but you’ll have to change the nectar more often so it doesn’t spoil.
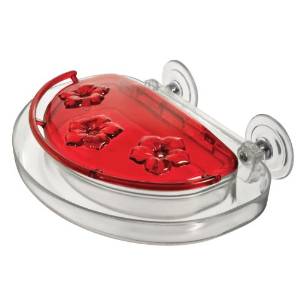
You should also look for a spot near a window so you will be able to watch the hummingbirds while they are at the feeder. You might want to try a window hummingbird feeder to really bring them up close.

How to keep your nectar fresh
The outside temperature will determine how long your nectar will stay fresh. The hotter the temperature the more often it will have to be changed. Hummingbirds won’t use a feeder that doesn’t contain fresh nectar. Generally, if the temperature stays below 70 degrees, you can usually get by changing the nectar once a week. As the outside temperature rises above 70 degrees you will have to change it more often to keep he nectar fresh and mold free. You can use the chart below as a general guide line on how often you can expect to have to add fresh nectar to your hummingbird feeder.
When should you change the hummingbird nectar? Here is a chart that tells you approximately when you should change your nectar
High temperatures…………Change nectar after
71-75……………………………6 days
76-80……………………………5 days
81-84……………………………4 days
85-88……………………………3 days
89-92……………………………2 days
93+………………………………change daily
This is only a general guide line and the actual timing may vary according to other factors such as hanging your feeder in the sun or shade, properly boiling your hummingbird nectar and properly cleaning your feeder between fillings.
A visual inspection of the feeder and the nectar will tell you when it has to be changed. If the nectar starts to look cloudy or it contains black spots of mold, it needs to be changed more often. If you wait too long, yeast will start to ferment the sugar and mold and bacteria will start to grow. The mold and bacteria can be harmful to your hummingbirds.
How to clean a hummingbird feeder
If you keep the nectar fresh, rinsing out the feeder with hot water each time you change the nectar should be enough. To maintain a clean feeder you should give it a good cleaning about once a month in a mild bleach solution. To make the bleach cleaning solution for your hummingbird feeder, just add 1/4 cup bleach to 1 gallon of water and soak your feeder for about an hour. When your feeder is done soaking take it out and thoroughly rinse it several times in running water to remove all traces of bleach so the bleach doesn’t harm the hummingbirds. This soaking in a mild bleach solution will help insure that your feeder stays clean and will be attractive to hummingbirds.
Any time your nectar becomes cloudy or has black mold growing in it you will also have to sterilize the feeder with the mild bleach solution. You may also have to use some small hummingbird feeder brushes to remove all traces of the mold from inside the feeder. Remember to rinse thoroughly before filling with nectar.
A good hummingbird feeder that’s easy to take apart and allows easy access to the inside of the feeder, is one that you are more likely to be able to keep clean. This is an important consideration when choosing a hummingbird feeder.
Here is a good video on cleaning a hummingbird feeder.
It shows the different types of hummingbird feeder brushes that are available to aid in feeder cleaning, especially in cleaning mold out of the feeder.
How to keep ants, bees and wasps off of your hummingbird feeder

OK, you’ve got your hummingbird recipe, your feeder is filled and it’s hung in a good location. All that’s left is to keep the bees, wasps and ants off of your feeder. The sweet hummingbird syrup inside your feeder will not only be attractive to hummingbirds, but it will also be very attractive to hummingbird feeder pests, such as ants, bees and wasps. I have seen bees and wasps so thick around my feeder that the hummingbirds couldn’t feed at all. And ants can actually get inside the feeder through the feeder ports, where they will die and contaminate the nectar.
Hummingbird pest can usually be controlled by choosing a good hummingbird feeder that prevents access to such pests. Some feeders come with a built-in ant moat that keeps ants from reaching the nectar. The ant moat or ant guard as it is sometimes called, is filled with water and the ants can’t swim, so they can’t get to the hummingbird food. If you have a feeder that doesn’t have a built-in moat you can always add an ant moat between the hanger and the feeder to keep out ants. There are also hummingbird feeders that have bee guards or nectar guard tips right on the feeders, that don’t allow the bees, wasps and other flying insects to reach the nectar.
Using a basin type feeder, rather than a bottle feeder will help keep ants away from your feeder. The air in a bottle feeder will expand and push nectar out of the feeder ports and onto the ground where the ants will find it and eventually find your feeder. A basin feeder won’t do this because all the nectar is below the feeding ports. For best results, the answer is to choose a good hummingbird feeder with all the features that keep pest away from the nectar. This will insure that you get the most enjoyment possible from feeding your hummingbirds and from using the hummingbird recipe.
Bees, wasps and other flying insect can also present a problem at your feeder. You have to be able to prevent them from getting to the nectar. If they can’t reach the nectar they will eventually give up and move on. The best hummingbird feeders, besides having an ant moat to keep out ants, will also have some type of bee guards or nectar guard tips to prevent bees from reaching the nectar.
Here is a helpful video that shows you how to bee proof your feeder using plastic mesh from an onion sack.
Related article
Cornell university feeder pest control article
How to hand-feed hummingbirds instructional video
Here is my instructional video that will teach you a quick, easy way to hand-feed your hummingbirds
Here is another technique you can use to hand-feed hummingbirds through a window in your home.
If you would like to watch my other videos on hand-feeding different backyard birds and squirrels, click the link Hand-feeding backyard birds and squirrels
Now you know the hummingbird recipe and can make your own hummingbird food. You know where to hang your feeder, when to change the nectar and how to clean your feeder. You also learned how to keep ants and bees out of your nectar and how to hand-feed your hummingbirds. All these things added together will allow you to have the most success at attracting hummingbirds and keep them returning on a regular basis. Enjoy your hummingbirds!
If you found this article helpful please share it using the social bookmarking buttons on the left side of this page. Help everyone to increase their enjoyment of hummingbirds. Do it for the hummingbirds!

