

For a complete guide to safe nectar ratios, cleaning schedules, and common mistakes, visit
How to Make Hummingbird Feeder Nectar: A Beginner’s Guide.
Takeaways
-
The safest hummingbird food recipe is 1 part white granulated sugar to 4 parts water, which closely matches natural nectar.
-
Do not use honey, brown sugar, or artificial sweeteners, and avoid adding red food coloring to the nectar.
- Keep nectar fresh by changing it every few days (more often in hot weather) and cleaning feeders regularly with hot water.
Ultimate Recipe for Hummingbird Food & Tips to Attract Hummingbirds to Your Feeder
Introduction
If you’re a bird lover, there’s nothing more captivating than watching a hummingbird flutter by, its wings beating so rapidly they almost blur. These tiny, colorful creatures are a joy to have around, but attracting them to your garden requires more than just planting beautiful flowers. The secret to bringing these magical creatures into your space is providing them with a consistent, nutritious food source.
One of the best ways to do this is by making your own hummingbird food. The recipe for hummingbird food is simple, cost-effective, and ensures that you’re offering them the best option for their well-being. Homemade nectar is free of additives, dyes, and preservatives, making it a much safer choice for the birds. In this comprehensive guide, we will explore the best recipe for hummingbird food, provide tips for attracting more of these incredible creatures, and answer common questions about feeding them.
What You Need to Know About Hummingbird Food
Before diving into the recipe itself, it’s important to understand the nutritional needs of hummingbirds and why providing the right kind of food is 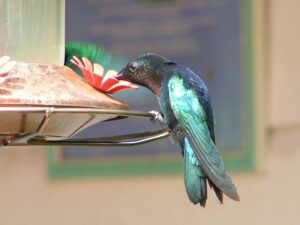 essential. Hummingbirds primarily feed on nectar, which provides them with the sugar and energy they need to fuel their rapid metabolism. In the wild, they obtain nectar from a variety of flowers, which can be diluted by rainwater or nectar-producing plants.
As much as they love flowers, feeding hummingbirds with homemade nectar mimics the natural sugar-water mixture they would get from flowers, making it a perfect way to nourish them in your garden. The beauty of using your own recipe is that you can control the ingredients and make sure that what you’re giving them is safe and healthy.
The Basic Recipe for Hummingbird Food
The recipe for hummingbird food is as simple as it gets. You’ll only need two basic ingredients to create the perfect nectar solution:
- 1 part white granulated sugar
- 4 parts water
This sugar-to-water ratio is important because it closely replicates the natural sugar content in flower nectar. Hummingbirds prefer a mixture with a sugar concentration between 20-25%, which helps them get the energy they need to survive and thrive.
Let’s break down the steps for making hummingbird food:
Step-by-Step Instructions for Making Hummingbird Nectar
1. Boil the Water
The first step in preparing your homemade hummingbird food is to boil the water. Boiling helps dissolve the sugar and also ensures that any potential contaminants or impurities are removed from the water.
You don’t need to boil a large amount of water, but boiling at least a cup of water will be enough to prepare the mixture. If you’re preparing a larger batch, adjust the water accordingly while maintaining the 1:4 sugar-to-water ratio.
2. Dissolve the Sugar
Once the water has boiled, add the white granulated sugar into the water. Stir the mixture continuously until the sugar is completely dissolved. This is a crucial step—if there’s any sugar left undissolved, the nectar will be less effective and could potentially clog up your hummingbird feeder.
It’s essential that you use granulated white sugar. Brown sugar, honey, or powdered sugar should not be used as alternatives because they contain impurities and can be harmful to hummingbirds. For example, honey can promote the growth of mold in the nectar, which is dangerous to birds.
3. Let the Nectar Cool
Once the sugar has dissolved completely, take the mixture off the heat and let it cool to room temperature. Never put hot nectar in your hummingbird feeder, as it can cause harm to the birds. Additionally, hot nectar can warp plastic feeders or damage the feeding ports.
Allow the nectar to cool for at least 30 minutes, ensuring that it’s cool but not cold before filling your feeder.
4. Fill Your Feeder
After the nectar has cooled down, pour it into your hummingbird feeder. Be sure to fill the feeder up only halfway, as excess nectar can spoil or ferment, especially in hot weather.
You can also store any leftover nectar in the fridge for up to a week. Just be sure to let it return to room temperature before refilling the feeder.
5. Clean Your Feeder Regularly
It’s important to clean your hummingbird feeder frequently—ideally once a week, or more often during hot weather. Mold and bacteria can quickly build up inside the feeder, which can harm the birds. To clean your feeder, disassemble it and wash each part with warm water and a mild soap solution. You can also use a bottle brush to clean the feeding ports thoroughly.
Why Homemade Hummingbird Nectar is the Best Option
While store-bought hummingbird nectar is available, it often contains artificial coloring, preservatives, and other additives that can harm hummingbirds in the long run. By making your own hummingbird food, you can ensure that the birds are getting a completely natural and safe food source. Here are some reasons why homemade nectar is always the best option:
- No Artificial Dyes: Many commercial nectar products contain red dyes that are harmful to birds. Red dye is unnecessary, as hummingbirds are naturally attracted to the red color of the feeder. You don’t need to add anything artificial to get their attention!
- No Preservatives: Store-bought nectar often contains preservatives to prolong shelf life. While these are generally safe for human consumption, they can be harmful to birds. Homemade nectar is free of chemicals and preservatives, making it the healthiest option for hummingbirds.
- Cost-Effective: Making your own hummingbird food is far cheaper than buying pre-made nectar. Sugar is an affordable and accessible ingredient, and making a large batch can last a long time.
- Freshness: Fresh nectar is always best for hummingbirds. Prepare the nectar in small batches so it is quickly used up. That ensures that the birds are always getting the freshest food.
Additional Tips for Attracting More Hummingbirds
Here’s a complete guide to attracting hummingbirds to your yard. It lists plants, vines and shrubs that are in bloom for spring, summer and fall. Your hummingbirds will always have flowers to feed on.
Making your own nectar is only one part of the equation when it comes to attracting hummingbirds to your garden. Here are some extra tips to 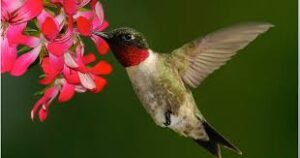 help you create the ultimate hummingbird-friendly space:
1. Plant Nectar-Rich Flowers
While nectar from feeders is a great food source for hummingbirds, they also love feeding from native plants with tubular-shaped flowers. These flowers are specially designed to attract hummingbirds with their long, narrow shapes, which are perfect for the birds to feed from.
Some excellent flowers to plant include:
- Bee Balm (Monarda)
- Trumpet Vine (Campsis radicans)
- Coral Honeysuckle (Lonicera sempervirens)
- Salvia (Salvia spp.)
- Fuchsia (Fuchsia spp.)
Native plants are particularly beneficial, as they attract not only hummingbirds but also other beneficial insects and pollinators to your garden.
2. Provide Shelter and Water Sources
Hummingbirds are small and vulnerable, so providing shelter in the form of shrubs, trees, or other plants can help them feel secure while feeding. Additionally, adding a birdbath or a small water fountain to your garden can give hummingbirds a place to drink and bathe. Moving water, like a small fountain, can be particularly attractive to them.
3. Choose the Right Feeder
Here’s the best hummingbird feeder to use. Easy to clean and keeps away ants and bees!
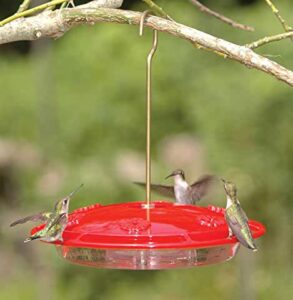
Not all hummingbird feeders are created equal. Look for a feeder that is easy to clean and refill. Feeders with bright red accents (but no red dye in the nectar) will attract hummingbirds more effectively. Choose feeders with narrow feeding ports to prevent larger birds from taking over.
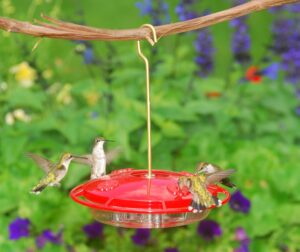
4. Hang Multiple Feeders
Here’s a great article that tells everything you need to know about how to choose the best place to hang your hummingbird feeder.
If you live in an area with a high population of hummingbirds, it’s a good idea to hang multiple feeders. This reduces competition between birds and ensures that each one has access to food. Be sure to space them out, so the birds have enough room to feed without being disturbed.
Hummingbird Aggression and What to Do About it.
5. Keep It Clean
Here’s a guide to help you clean your hummingbird feeder
As mentioned earlier, cleaning your hummingbird feeder is vital. Ensure that you thoroughly clean it every week, especially during the warmer months when nectar can spoil more quickly. If mold or insects appear, clean the feeder immediately to avoid harming the birds.
Here is a good video on how to clean a hummingbird feeder
Common Mistakes to Avoid When Feeding Hummingbirds
While feeding hummingbirds can be a rewarding experience, there are a few common mistakes to watch out for:
- Using the wrong type of sugar: Never use brown sugar, powdered sugar, or honey in hummingbird nectar. Use only white granulated sugar.
- Leaving nectar out too long: If nectar has been sitting out for more than a couple of days, it may start to ferment or spoil. Always clean the feeder regularly.
- Using feeders with improper designs: Some feeders are hard to clean or have features that make it difficult for hummingbirds to feed safely. Choose simple, easy-to-clean designs with small, narrow ports. Here’s the best designed hummingbird feeder to use. It’s leak proof, so it won’t attract insects and it’s easy to take apart and clean.
Below is a chart that shows different temperature ranges
and a general guide as to when the nectar should be changed
High temperatures …….Change nectar after
71-75 6 days
76-80 5 days
81-84 4 days
85-88 3 days
89-92 2 days
93+ change daily
Conclusion
Providing a homemade recipe for hummingbird food is one of the most rewarding and effective ways to attract these beautiful birds to your garden. Not only will you be offering them a safe and nutritious food source, but you’ll also enjoy the beauty of these vibrant creatures as they flit around your yard. With a little preparation, the right feeder, and some thoughtful garden design, you can create an environment that hummingbirds will love.
So, gather your ingredients, set up your feeders, and get ready to welcome these enchanting creatures to your garden. Happy bird watching!
One of the best Hummingbird feeders that’s easy to take apart and clean is the HummZinger Ultra.
Aspects 12oz HummZinger Ultra With Nectar Guard.
The HummZinger has patented Nectar guard tips which are flexible membranes attached to the feed ports that prohibit entry from flying insects, but allow Hummingbirds to feed as usual. The HummZinger also has a built in ant moat that will stop crawling insects from getting to the nectar. It also has raised flower ports that divert rain.
This mid-size nectar feeder has a 12 oz. capacity and can be hung or post mounted with hardware provided. It has four feeding ports and is made of unbreakable polycarbonate. For ease of cleaning and protection from bees, wasps and ants, this feeder can’t be beat.
A dirty feeder won’t attract hummingbirds and is harmful to the hummingbirds. When the food becomes cloudy you know it is time to change it or mold will grow on your feeder.
Clean your feeder frequently. You can soak them in a mild bleach solution (10 parts hot water to 1 part chlorine bleach). Soak for 15 minutes and then rinse thoroughly before filling it with hummingbird food.
Here’s a comprehensive guide to help you clean your hummingbird feeder
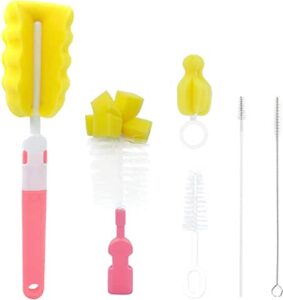 |
Smallbottle brushes and pipe cleaners are always helpful to dislodge mold inside the feeder and in the feeding ports. It is necessary to have a clean mold free feeder to attract hummingbirds and to keep them healthy. |
If you already have a hummingbird feeder, and you want to protect it from ants and other crawling insects, the ant moat below will do the job.
Trap-It Ant Moat for Hummingbird Feeders
Using an ant moat for your hummingbird feeder is an effective way to keep ants away from the sweet nectar. These tiny creatures are drawn to the sugar water, and without a barrier, they will quickly infest your feeder, preventing the birds from enjoying the nectar. An ant moat works by creating a barrier of water that ants can’t cross. Positioned above the feeder, it effectively blocks the ants’ path, keeping them from reaching the nectar.
This simple solution also ensures that your hummingbird feeder remains clean and accessible for the birds, rather than becoming a breeding ground for ants or other pests. It’s a small addition that can make a big difference in maintaining a healthy, inviting space for hummingbirds, while also reducing the need for chemical ant deterrents.
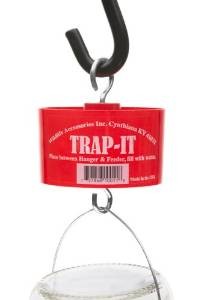
The first and still the best to protect your Hummingbird and Oriole feeder from antsand other crawling insects. Insert between hanger and feeder and fill with water, providing a barrier to crawling pests. Red color to attract hummingbirds.
Enjoy your hummingbirds!
If you found this article helpful please share it with your friends using the social bookmarking buttons on the left side of this page. Help everyone to increase their knowledge and enjoyment of feeding hummingbirds. Do it for the hummingbirds! It also helps my ranking so my information will be available to more people. The more people that see this vital information, the more the hummingbirds are helped. Thank for your help. The hummingbirds and I appreciate you very much!
Frequently Asked Questions
What is the best sugar-to-water ratio for hummingbird food?
Use 1 part white granulated sugar to 4 parts water (a 1:4 ratio), such as ¼ cup sugar to 1 cup water.
Do I need to boil the water when making hummingbird food?
Boiling is not strictly required, but many experts recommend bringing the solution to a brief boil to help it dissolve well and stay fresh a bit longer.
Can I add red food coloring to the nectar?
No. Red dye is unnecessary and may be harmful; a red feeder or ribbon provides all the color needed to attract hummingbirds.
How often should I change the hummingbird nectar?
Change the nectar every 2–3 days in warm weather and daily during very hot spells, discarding any cloudy or moldy nectar immediately.
Expert Hummingbird Resources
U.S. Fish & Wildlife Service – Hummingbirds of North America
Federal overview of hummingbird species, distribution, and conservation context.
https://www.fws.gov/apps/story/hummingbirds-north-america
U.S. Fish and Wildlife Service – Hummingbird Conservation
This site offers detailed information about various hummingbird species, their habitats, and conservation efforts. It also provides resources on how to protect these fascinating birds.
National Park Service – Hummingbird Resources
The National Park Service offers insights into hummingbird species found in national parks, their behaviors, and their role in ecosystems, along with tips for observing them.
Smithsonian National Museum of Natural History – Birds: Hummingbirds
This resource provides educational materials on the role of hummingbirds in pollination and biodiversity, backed by scientific research and exhibits from the Smithsonian.