Have you ever watched a hummingbird hover near a flower? These tiny, colorful birds are amazing to see! If you want to attract more hummingbirds to your yard, making your own hummingbird food is a great way to do it. Don’t worry, it’s easier than you might think! In this guide, we’ll walk you through everything you need to know about creating delicious nectar that will have hummingbirds flocking to your feeders. Let’s dive in and learn how to make hummingbird food! The simple recipe consists of 1 part granulated sugar to 4 parts water.
If you make hummingbird food, the hummingbirds will come.
That’s about how simple it is to attract hummingbirds to your backyard. Make hummingbird food using the simple formula in this article, put it in a red feeder, hang it where the hummingbirds can see it and if there are any hummingbirds in your area it won’t take you long to find out.
If you have what they like it won’t take them long to find it.
My personal story about attracting hummingbirdsds
It reminds me of a time many years ago when I decided to plant a small hummingbird garden to see if I could attract some hummingbirds. I bought a honeysuckle vine to plant along a fence in the backyard. I was in a hurry to grow a garden, so I bought the biggest one I could find. The vine I found was about 4 feet tall and even had blooms on it.
I just got home from the nursery and took the potted honeysuckle vine out of the car and set it on the ground in the backyard. Then I went inside to get something. I got back about 5 minutes later….. and like magic, there was already a hummingbird feeding on the blooms!
You can’t imagine how excited I was to see a hummingbird so soon. That was just the start of many hummingbird vines and many hummingbird plants that ended up residing in my backyard.
So make hummingbird food and put up a feeder and you too will enjoy that magical moment when for the first time a hummingbird appears, seemingly out of nowhere.
What You’ll Need to Make Hummingbird Food
Before we start cooking, let’s gather all the supplies we’ll need. The good news is, you probably have most of these items in your kitchen already!
Ingredients
-
White sugar (the regular kind you use at home)
-
Clean, fresh water
That’s right, just two simple ingredients! Hummingbirds don’t need anything fancy. In fact, using only these two items is the safest and healthiest option for our tiny feathered friends.
Equipment
-
A measuring cup
-
A saucepan
-
A spoon for stirring
-
A clean bottle or container to store the food
Now that we have everything ready, let’s move on to the fun part – making the nectar!
Use Songbird Essentials Nectar Aid Self Measuring Pitcher and never measure ingredients again. Make any amount and the ingredients are measured for you.
 |
The Perfect Hummingbird Food Recipe
Making hummingbird food is a lot like making a very simple sugar water. Here’s how to do it step by step:
Step 1: Measure the Ingredients
First things first, we need to measure our sugar and water. The most important thing to remember is the ratio: use 1 part sugar to 4 parts water. This mixture closely resembles the natural nectar found in flowers that hummingbirds love to drink.
For example, if you want to make a standard batch, you would use:
-
1 cup of white sugar
-
4 cups of water
If you want to make more or less, just keep this 1:4 ratio in mind. So, for a smaller batch, you could use 1/4 cup of sugar and 1 cup of water. Easy, right?
Step 2: Combine and Heat
Now that we’ve measured our ingredients, it’s time to mix them together. Here’s what to do:
-
Pour the water into your saucepan.
-
Add the sugar to the water.
-
Place the saucepan on the stove and turn the heat to medium.
-
Stir the mixture gently but consistently.
-
Keep stirring until all the sugar dissolves completely.
Here’s an important tip: Don’t let the mixture boil! We’re just warming it up enough to help the sugar dissolve. Boiling isn’t necessary and might change the sugar in ways that aren’t good for hummingbirds.
How do you know when it’s ready? The water will look clear, and you won’t see any sugar granules when you stir. This usually takes about 1-2 minutes.
Step 3: Cool and Store
Great job! You’ve made the nectar. But we’re not quite done yet. Follow these last few steps:
-
Turn off the heat.
-
Let the sugar water cool down to room temperature. This is important because hot nectar can harm hummingbirds.
-
Once it’s cool, pour the nectar into your clean storage container.
-
If you’re not using it right away, keep it in the fridge. The nectar can last for up to a week when refrigerated.
And there you have it! You’ve successfully made hummingbird food. But before you rush to fill your feeders, there are a few more things you should know to keep your hummingbirds healthy and happy.
Important Tips for Making and Serving Hummingbird Food
Making the food is just the first step. How you serve it and take care of your feeders is just as important. Here are some crucial tips to remember:
Use the Right Sugar
Always use plain, white, granulated sugar. This might seem odd, but it’s actually the healthiest option for hummingbirds. Here’s what to avoid:
-
Brown sugar: It contains molasses, which can be harmful to hummingbirds.
-
Honey: It can promote dangerous fungal growth.
-
Artificial sweeteners: These provide no nutrients to hummingbirds.
-
Red food coloring: It’s unnecessary and might be harmful.
Stick with plain white sugar, and your hummingbirds will thank you!
Maintain Proper Hygiene
Keeping everything clean is super important. Dirty feeders can make hummingbirds sick. Follow these guidelines:
-
Clean your feeders thoroughly before each refill. Use hot water and a brush to scrub away any mold or dirt.
-
Replace the nectar every 3-5 days, even if the feeder isn’t empty.
-
In hot weather, change the nectar more often – every 2-3 days.
-
If you see any signs of mold or the nectar looks cloudy, clean the feeder and replace the nectar immediately.
Remember, clean feeders mean healthy hummingbirds!
Here’s a comprehensive guide to help you clean your hummingbird feeder for those times when the nectar is not changed soon enough and mold starts to grow.
Correct Feeder Placement
Where you put your feeder can make a big difference in attracting hummingbirds. Here are some tips:
-
Hang feeders in a shaded area. This helps keep the nectar fresh longer.
-
Place feeders near flowering plants. Hummingbirds are naturally drawn to flowers, so this can help them find your feeder.
-
If you have multiple feeders, spread them out. Hummingbirds can be territorial and might try to guard a single feeder.
-
Make sure the feeder is visible. Hummingbirds need to be able to see it to use it!
-
Keep feeders away from windows to prevent bird collisions.
By following these tips, you’ll create a safe and attractive environment for hummingbirds to visit and feed.
Here’s a great article that tells everything you need to know about how to choose the best place to hang your hummingbird feeder.
Frequently Asked Questions
Still have questions? Don’t worry! Here are answers to some common questions about making hummingbird food:
Can I use brown sugar to make hummingbird food?
No, it’s best to stick with white sugar. Brown sugar contains molasses, which isn’t good for hummingbirds. The molasses can cause health problems and even damage their tiny livers. White sugar is the safest option.
How often should I change the hummingbird food?
You should change the nectar every 3-5 days, even if the feeder isn’t empty. In hot weather, change it more often – every 2-3 days. Always clean the feeder before you refill it. This prevents harmful mold and bacteria from growing.
How to be sure the hummingbird nectar stays fresh and doesn’t start to ferment
You will have to change it every now and then. How often you will have to change it will depend on the weather. The cooler the temperature, the longer your hummingbird food sugar will last without fermenting. Below is a temperature chart to give you an idea as to how long you can expect your hummingbird food to last before needing changing. If the temperature stays around 71 to 75 degrees, for example, your nectar should be OK for about 6 days before needing changed. If the temperature is in the 76 to 80 degree range it will need to be changed after about 5 days.
High temperatures…………Change nectar after
71-75……………………………6 days
76-80……………………………5 days
81-84……………………………4 days
85-88……………………………3 days
89-92……………………………2 days
93+………………………………change daily
Use these guidelines while keeping an eye on your feeder. If you notice the nectar starting to get cloudy, go ahead and change it. If you wait too long mold will grow in the nectar and on your feeder.
Do I need to add red food coloring to attract hummingbirds?
Nope! The red color on your feeder is enough to catch their eye. Most hummingbird feeders are already red, which is perfect. Adding food coloring to the nectar isn’t necessary and might even be harmful to the birds. So, skip the food coloring and let the feeder do the attracting!
Can I make a large batch of nectar and store it for later use?
Yes, you can! If you want to make a bigger batch, just keep the 1:4 sugar-to-water ratio. Store the extra nectar in a clean container in the refrigerator. It will stay good for up to a week. Remember to let it come to room temperature before filling your feeder.
What if I see other birds or insects using the hummingbird feeder?
It’s common for other creatures to be attracted to the sweet nectar. Bees, ants, and even some larger birds might try to drink from the feeder. Most hummingbird feeders are designed to make it hard for other animals to reach the nectar. If it becomes a problem, you can try moving the feeder or using an ant moat to keep insects away.
How to keep ants and other insects out of your feeder
If you already have a hummingbird feeder, and you want to protect it from ants and other crawling insects, the ant moat below will do the job.
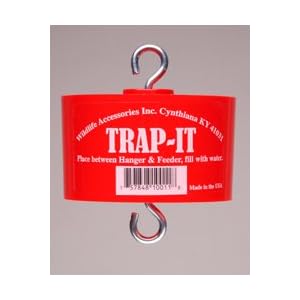
Trap-It Ant Moat for Hummingbird Feeders
Product Description
The first and still the best to protect your Hummingbird and Oriole feeder from ants and other crawling insects. Insert between hanger and feeder and fill with water, providing a barrier to crawling pests. Red color to attract hummingbirds.
Now you see how easy it is for anyone to make hummingbird food and to attract hummingbirds.
Take care of your feeder and you will be rewarded with lots of hummingbirds to enjoy. I hope you enjoyed this article on make hummingbird food.
When should I put out hummingbird feeders?
The best time to put out feeders depends on where you live. In most parts of the United States, you can put feeders out in early spring, around March or April. This is when hummingbirds start to migrate north. Keep your feeders up until you haven’t seen a hummingbird for a couple of weeks in the fall. Some people like to leave a feeder up all winter, just in case a late migrator comes through!
Here’s a guide that tells when to start and when to stop feeding hummingbirds.
Hummingbird feeder maintenance
Now that you know how to make hummingbird food, you also need to know how to keep your feeder clean so the hummingbirds will keep returning to your feeder.
To help keep your feeder clean, rinse it out with hot water every time you change the nectar. Once a week you should also rinse it out with a vinegar and water solution. One part white vinegar to four parts water.
Here’s a comprehensive guide to help you clean your hummingbird feeder for those times when the nectar is not changed soon enough and mold starts to grow.
What to do if your feeder gets moldy
If you forget to change your nectar and mold does start to grow in it, you will have to clean your hummingbird feeder with a bleach water solution. Make a 1/4 cup bleach to 1 gallon of water solution and soak your feeder in it for about an hour to kill the mold and sterilize the feeder.
You may have to use a small bottle brush to remove any mold that clings to your feeder. Rinse your hummingbird feeder several times with running water to be sure to remove all traces of the bleach water before refilling with your homemade hummingbird nectar.
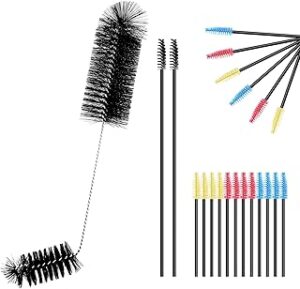
You can make your feeder cleaning a lot easier if you first start with a feeder that’s easy to take apart and clean. Here is the perfect hummingbird feeder you should have.
Use a feeder that’s easy to clean
Now that you know how to make hummingbird food, you will need to get a feeder that is easy to take apart and clean, and one that will also protect your hummingbird food from bees ants and wasps.
My favorite choice of hummingbird feeders to use with the make hummingbird food recipe is 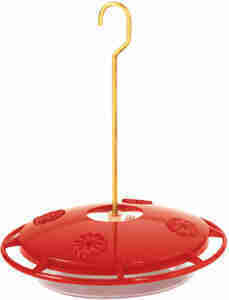 Aspects 12oz Hummzinger Ultra With Nectar Guard
The HummZinger has patented Nectar guard tips which are flexible membranes attached to the feed ports that prohibit entry from flying insects, but allow Hummingbirds to feed as usual. The HummZinger also has a built in ant moat that will stop crawling insects from getting to the nectar. It also has raised flower ports that divert rain and keep the nectar from becoming diluted.
This mid-size nectar feeder has a 12 oz. capacity and can be hung or post mounted with hardware provided. It has four feeding ports for hummingbirds and is made of unbreakable polycarbonate. Easy to clean.
For ease of cleaning and protection from bees, wasps and ants, this feeder can’t be beat.
Conclusion
Congratulations! You’re now an expert on making hummingbird food. By following this guide, you’ll create safe and delicious nectar that will attract these fascinating little birds to your yard. Remember the key points:
-
Use a 1:4 ratio of white sugar to water.
-
Don’t add any other ingredients like honey or food coloring.
-
Keep your feeders clean and change the nectar regularly.
-
Place your feeders in shady spots near flowers.
Making hummingbird food is a fun and rewarding activity. Not only will you save money compared to buying pre-made nectar, but you’ll also have the satisfaction of knowing exactly what’s in the food you’re providing. Plus, you’ll get to enjoy the amazing sight of hummingbirds visiting your yard!
So why wait? Grab your sugar and water, and start making some hummingbird nectar today. Before you know it, you’ll be watching these incredible little birds zip around your garden, their wings humming and their feathers shimmering in the sunlight. Happy bird watching!
If you found this article helpful please share it with your friends using the social bookmarking buttons on the left side of this page. Help everyone to increase their enjoyment of feeding hummingbirds. Do it for the hummingbirds!
Hummingbird Resources
U.S. Fish and Wildlife Service – Hummingbird Conservation
This site offers detailed information about various hummingbird species, their habitats, and conservation efforts. It also provides resources on how to protect these fascinating birds.
National Park Service – Hummingbird Resources
The National Park Service offers insights into hummingbird species found in national parks, their behaviors, and their role in ecosystems, along with tips for observing them.
Smithsonian National Museum of Natural History – Birds: Hummingbirds
This resource provides educational materials on the role of hummingbirds in pollination and biodiversity, backed by scientific research and exhibits from the Smithsonian.
U.S. Geological Survey – Hummingbird Studies
The USGS offers research on hummingbird migration patterns, population dynamics, and environmental threats, including studies on climate change impacts.
The Cornell Lab of Ornithology – Hummingbirds
While not strictly a government site, Cornell partners with federal agencies to provide valuable scientific insights into hummingbird behavior, conservation, and field guides.

