How to Make Your Own Hummingbird Food Mix: A Simple and Affordable Guide
Hummingbirds are some of the most enchanting creatures, known for their vibrant colors and agile flights. If you’re looking to attract these little visitors to your garden, one of the best ways to do so is by offering them homemade nectar. Not only is making your own hummingbird food mix easy and cost-effective, but it also allows you to provide a safe and nutritious food source. In this guide, we’ll walk you through the process of creating your own nectar and tips for maintaining your feeding stations.
Why Make Your Own Hummingbird Nectar?
Save Money with Homemade Hummingbird Food
Buying commercial hummingbird nectar can quickly add up, especially if you have several feeders. By making your own nectar, you can save money while ensuring your feathered friends always have a fresh supply of food.
Control the Ingredients in Your Hummingbird Food Mix
Store-bought hummingbird food often contains artificial colors and preservatives, which can be harmful to birds. When you prepare your own nectar, you can ensure that the ingredients are natural and free of chemicals—just pure sugar and water. This makes your homemade food a healthier and safer option.
Provide a Natural Food Source
Hummingbirds feed on flower nectar, which is essentially a sugar-water solution. By creating your own nectar, you’re mimicking what they would find in nature, providing a food source that aligns with their nutritional needs.
Ingredients You Need for Homemade Hummingbird Nectar
Before you start, it’s important to gather the right ingredients and tools for preparing your homemade hummingbird nectar:
Ingredients:
- White Granulated Sugar: The main ingredient in your hummingbird nectar. Stick to white table sugar, as it closely matches the sugar in flower nectar.
- Tap Water: Fresh tap water works fine. If you’re concerned about chlorine, you can use filtered or boiled water.
Supplies:
- Saucepan: A medium-sized saucepan will help you mix and heat the water and sugar.
- Stirring Spoon: Use a spoon to stir the sugar into the water as it heats.
- Measuring Cups: Accurate measurements ensure the correct sugar-to-water ratio for your nectar.
- Hummingbird Feeder: Once your nectar is ready, you’ll need a feeder to serve it.
The Perfect Recipe for Hummingbird Nectar
Creating the ideal nectar for your feeders is all about getting the right sugar-to-water ratio. The correct mixture will ensure your hummingbirds are getting the necessary nutrients they would naturally find in flowers.
The Best Ratio for Hummingbird Food
The standard recipe for homemade nectar is a 4:1 ratio of water to sugar. This means for every 4 parts of water, you’ll use 1 part sugar, resulting in a solution that is approximately 20% sugar. This ratio closely mimics the nectar that hummingbirds consume from flowers.
Step-by-Step Guide to Making Hummingbird Nectar
- Combine Water and Sugar
In a saucepan, combine 4 cups of water with 1 cup of white granulated sugar. Stir to begin dissolving the sugar. - Heat the Mixture
Place the saucepan on medium-high heat and stir continuously until the sugar is completely dissolved in the water. - Bring to a Boil
Allow the mixture to come to a boil. Once boiling, let it continue to boil for about 2 minutes. This step helps eliminate chlorine from the tap water and kills any mold spores that might be present in the sugar. - Cool the Nectar
After boiling for 2 minutes, remove the pan from the heat and allow the nectar to cool to room temperature before using it. - Fill Your Feeder
Once the nectar has cooled, pour it into your hummingbird feeder. Be sure to clean the feeder thoroughly before refilling to avoid any mold buildup. - Store Leftover Nectar
If you have extra nectar, store it in an airtight container in the refrigerator. It will stay fresh for up to two weeks. When refilling your feeder, make sure the nectar is at room temperature.
Making hummingbird nectar
Why Boiling the Nectar is Crucial
Removing Chlorine and Other Chemicals
Most tap water contains small amounts of chlorine or other chemicals. While they’re safe for humans, they can be harmful to birds. Boiling your nectar helps to remove chlorine and ensure the safety of the birds.
Killing Mold Spores
Sugar can sometimes contain mold spores, especially if it’s been stored for a while. By boiling the nectar, you kill any potential mold spores, ensuring that the nectar you serve is clean and safe.
The debate over whether to boil homemade hummingbird nectar has puzzled many bird enthusiasts. This guide will explore the pros and cons of boiling your hummingbird food
Storing and Using Hummingbird Nectar
Proper Storage in the Refrigerator
Once your nectar has cooled, you can store any leftovers in the refrigerator for up to two weeks. This will keep the nectar fresh until you’re ready to refill the feeder.
Check for Spoilage
Even if your homemade nectar is stored correctly, it’s always a good idea to check it before refilling the feeder. If it looks cloudy or smells sour, it’s time to make a fresh batch.
The key to Consistently Attracting Hummingbirds to Your Feeder
The key is to change the nectar often enough that the hummingbirds always find fresh nectar in your feeder. Also, you must keep your feeder
clean so your fresh nectar isn’t contaminated by a dirty feeder.
How warm or cold the outside temperature gets will determine how often you will need to change the nectar. Below is a chart that will give you a good idea how long the nectar will last based on temperature. Also, anytime you notice your nectar getting cloudy, you need to dump it out and put in fresh nectar.
Temperatures……Change nectar after
71-75……………………………6 days
76-80……………………………5 days
81-84……………………………4 days
85-88……………………………3 days
89-92……………………………2 days
93+………………………………change daily
Each time you change the hummingbird food mix in your feeder, be sure to rinse your feeder out with hot water to help keep your feeder clean.
If your hummingbird food is not changed on time, it will get moldy and mold will grow on your feeder.
What to Do If Your Feeder Gets Moldy
If your feeder gets moldy, you will have to soak the whole feeder in a bleach water solution. Mix a 10% bleach and water solution and soak your entire feeder for an hour.
Cleaning Your Hummingbird Feeder
Regular cleaning is just as important as preparing fresh nectar. Feeders can accumulate mold, bacteria, and pests if not cleaned regularly. Here’s how to keep your feeder in top shape:
Step-by-Step Cleaning
- Disassemble the Feeder
Take apart all the components of the feeder, including the nectar reservoir and any hanging pieces. - Wash with Hot Water
Use hot water to wash the feeder thoroughly. A bottle brush is helpful for scrubbing the inside and any tight spaces. - Soak in Vinegar Solution
For stubborn mold, soak the feeder in a 10% vinegar-90% water solution for 60 minutes. This will help break down mold and bacteria. - Rinse and Dry
Be sure to rinse the feeder thoroughly before drying all parts completely before refilling with fresh nectar.
Here’s a comprehensive guide to help you clean your hummingbird feeder for those times when the nectar is not changed soon enough and mold starts to grow.
Here is a good video on how to clean a hummingbird feeder
Attracting More Hummingbirds to Your Garden
Add More Feeders
To draw more hummingbirds to your yard, consider setting up additional feeders. Place them in different areas of your garden to ensure the birds have plenty of places to feed without competition.
Choose Safe Locations for Feeders
Place feeders in areas that are safe and sheltered from predators. Hummingbirds tend to feed in shaded or partially shaded spots, as it helps
keep the nectar fresh for longer.
Here’s a great article that tells everything you need to know about how to choose the best place to hang your hummingbird feeder.
Plant Hummingbird-Friendly Flowers
Planting hummingbird-friendly flowers is an excellent way to attract these vibrant birds to your garden. Hummingbirds are drawn to nectar, but they also have a strong affinity for flowers with bright colors, particularly red, orange, and pink. These colors serve as visual cues that signal the presence of nectar-rich flowers, which are essential for their survival.
Why Plant Hummingbird-Friendly Flowers?
-
Attract More Hummingbirds: By incorporating red, orange, and pink flowers into your garden, you can naturally attract more hummingbirds. These flowers complement nectar feeders, making your garden a more appealing destination for these birds.
-
Provide Nectar and Pollen: Many flowers not only offer nectar but also pollen, which provides essential protein for hummingbirds. This combination helps support their high metabolism and energy needs.
-
Create a Hummingbird Haven: A garden filled with hummingbird-friendly flowers creates a welcoming environment that encourages these birds to stay longer. This can lead to more frequent visits and even nesting in your garden.
Recommended Flowers
Some of the best flowers to plant for hummingbirds include:
-
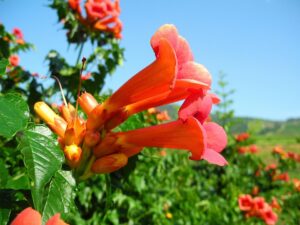
Trumpet Vine (Campsis radicans): Known for its bright orange to red flowers.
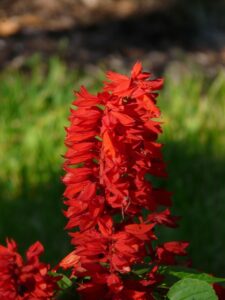
Salvias: These come in a variety of colors, including red and pink.
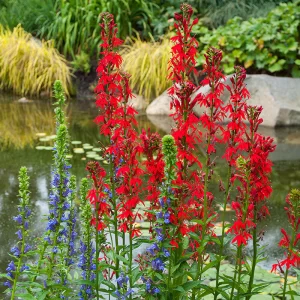
Cardinal Flower (Lobelia cardinalis): Features vibrant red flowers.
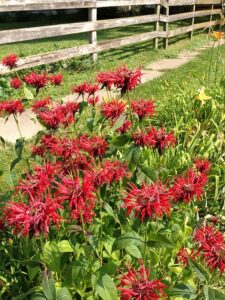
Bee Balm (Monarda didyma): Available in red, pink, and purple.
-
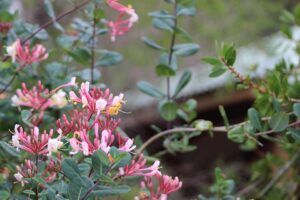
Honey suckle (Lonicera): Offers red, orange, and pink flowers.
Tips for Planting
-
Choose a Variety: Plant a mix of flowers that bloom at different times to provide a constant source of nectar throughout the growing season.
-
Consider Sunlight: Most hummingbird-friendly flowers require full sun to partial shade.
-
Maintain Your Garden: Keep your garden well-watered and fertilized to ensure healthy blooms.
By incorporating these flowers into your garden, you can create a hummingbird-friendly oasis that attracts these beautiful birds and provides them with the resources they need to thrive.
Here’s a complete guide to attracting hummingbirds to your yard. It lists plants, vines and shrubs that are in bloom for spring, summer and fall. Your hummingbirds will always have flowers to feed on.
Common Mistakes to Avoid
Don’t Use Artificial Sweeteners
Never use artificial sweeteners in your hummingbird nectar. These substances can be harmful to hummingbirds. Stick to regular white sugar for
the best results.
Avoid Too Much Sugar
While it’s tempting to make nectar extra sweet, it’s important not to use too much sugar. Stick to the recommended 4:1 ratio for a healthy mixture that the birds can safely consume. Also a higher sugar content makes the nectar more attractive to bees.
Clean Feeders Regularly
A dirty feeder is a breeding ground for mold and bacteria. Clean your feeder at least once a week to maintain a safe feeding environment for the hummingbirds.
Here’s a comprehensive guide to help you clean your hummingbird feeder for those times when the nectar is not changed soon enough and mold starts to grow.
Conclusion: Enjoy Watching Hummingbirds Visit Your Garden with Fresh Nectar
Making your own hummingbird food mix is not only cost-effective but also provides your feathered visitors with a healthy, natural food source. By following the simple steps in this guide, you can create fresh, nutritious nectar that attracts hummingbirds to your backyard. Remember to clean your feeders regularly and always offer fresh nectar to keep your backyard buzzing with life.
Now that your homemade hummingbird food mix is done, you will need to get a feeder that is easy to take apart and clean, and one that will also protect your hummingbird food mix from bees ants and wasps.
My favorite choice of hummingbird feeders to use with the hummingbird food mix is
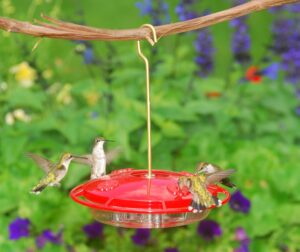
Aspects 12oz Hummzinger Ultra With Nectar Guard
It’s inexpensive and has several features that makes it well worth the price.
The HummZinger has patented Nectar guard tips which are flexible membranes attached to the feed ports that prohibit entry from flying insects, but allow Hummingbirds to feed as usual. The HummZinger also has a built in ant moat that will stop crawling insects from getting to the nectar. It also has raised flower ports that divert rain.
This mid-size nectar feeder has a 12 oz. capacity and can be hung or post mounted with hardware provided. It has four feeding ports for hummingbirds and is made of unbreakable polycarbonate. Easy to clean.
For ease of cleaning and protection from bees, wasps and ants, this feeder can’t be beat.
If you already have a hummingbird feeder, and you want to protect it from ants and other crawling insects, the ant moat below will do the job.
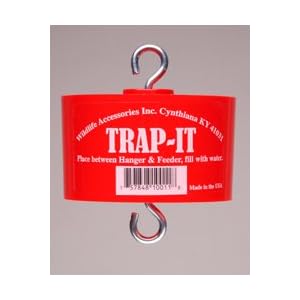
Trap-It Ant Moat for Hummingbird Feeders, Red
The first and still the best to protect your Hummingbird and Oriole feeder from ants and other crawling insects. Insert between hanger and feeder and fill with water, providing a barrier to crawling pests. Red color to attract hummingbirds.
Now you can make your own homemade hummingbird food mix. All that’s left to do is to change your nectar on time, according to the table, keep your feeder clean, and you will be enjoying lots of hummingbirds as they feed at your feeder.
 |
When it comes time to clean your hummingbird feeder you will need some hummingbirds feeder brushes to help remove the mold from all the crooks and crannies of the feeder.
To make feeder cleaning quicker and easier, get a feeder that’s easy to take apart and allows easy access to all the internal areas of the feeder. |
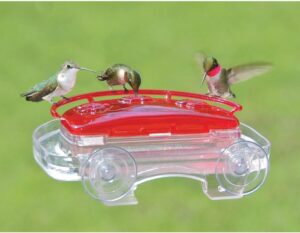
Imagine the thrill of watching hummingbirds up close as they hover right outside your window. With a hummingbird window feederthat attaches securely with suction cups, you’ll get the most intimate, breathtaking view of these tiny marvels in action. It’s not just a feeder – it’s an all-access pass to nature’s beauty, right in the comfort of your own home. Don’t just feed the birds, experience them like never before!
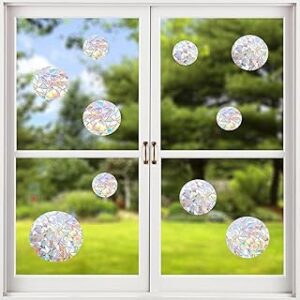
Anytime you install a window hummingbird feeder you will also need Window Decals to Prevent Bird Strikes.
If you found this article helpful please share it with your friends using the social bookmarking buttons on the left side of this page. Help everyone to increase their knowledge and enjoyment of feeding hummingbirds. Do it for the hummingbirds! It also helps my ranking so my information will be available to more people. The more people that see this vital information, the more the hummingbirds are helped. Thank for your help. The hummingbirds and I appreciate you very much!
