

For a complete guide to safe nectar ratios, cleaning schedules, and common mistakes, visit
How to Make Hummingbird Feeder Nectar: A Beginner’s Guide.
Our guide shows you how to make the perfect homemade nectar. It’s easy, cheap, & safe for the birds!
Are you eager to attract the mesmerizing beauty of hummingbirds to your garden? Look no further! This comprehensive guide will walk you through the process of creating your own homemade hummingbird nectar. By the end, you’ll be an expert in crafting a safe, nutritious, and cost-effective solution that these tiny marvels will absolutely adore.
Introduction
Hummingbirds are nature’s little jewels, captivating us with their vibrant colors and incredible flying abilities. These tiny creatures have an 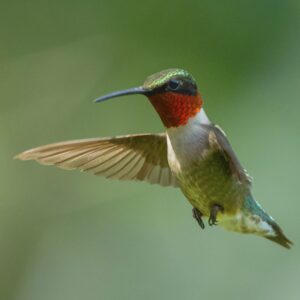 insatiable appetite, consuming up to half their body weight in nectar each day. That’s where you come in! By providing a reliable source of homemade nectar, you can create a haven for these delightful visitors.
Store-bought nectar might seem convenient, but it often contains preservatives and artificial colors that can be harmful to hummingbirds. Moreover, making your own nectar is not only healthier for the birds but also significantly more cost-effective. Plus, there’s a certain joy in knowing you’re providing the best possible care for your feathered friends.
In this guide, we’ll cover everything from the perfect nectar recipe to proper feeder maintenance. You’ll learn why homemade nectar is superior, how to avoid common mistakes, and even how to adjust your feeding practices with the changing seasons. So, let’s dive in and start attracting those hummingbirds!
The Perfect Hummingbird Nectar Recipe
Creating the ideal nectar for hummingbirds is simpler than you might think. In fact, you probably already have the ingredients in your kitchen. Let’s break it down step by step.
Ingredients You’ll Need
First things first, here’s what you’ll need:
-
White granulated sugar
-
Water
That’s it! You might be surprised to see only two ingredients, but this simple combination closely mimics the natural nectar found in flowers that hummingbirds favor.
It’s crucial to use only white granulated sugar. Brown sugar, honey, or artificial sweeteners can be harmful to hummingbirds. These alternatives often contain additional minerals or compounds that the birds’ delicate systems aren’t equipped to process. Stick with plain, white sugar for the safest and most beneficial nectar.
Step-by-Step Preparation
Now that you have your ingredients ready, let’s make some nectar!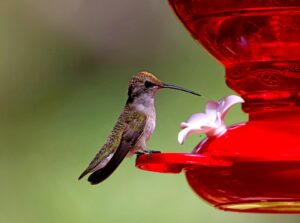
-
Measure the ingredients: Use a ratio of 1 part sugar to 4 parts water. For example, 1 cup of sugar to 4 cups of water.
-
Boil the water: This step helps dissolve the sugar more effectively and eliminates any potential contaminants in the water.
-
Mix and dissolve: Add the sugar to the boiling water and stir until it’s completely dissolved. There should be no sugar granules visible.
-
Cool the nectar: Allow the mixture to cool to room temperature before filling your feeders. Never add hot nectar to your feeders as it can warp the plastic and potentially harm the birds.
-
Store properly: If you have extra nectar, store it in a clean, airtight container in the refrigerator for up to two weeks.
Remember, the key to perfect hummingbird nectar is consistency and cleanliness. Always use clean utensils and containers when preparing and storing your nectar.
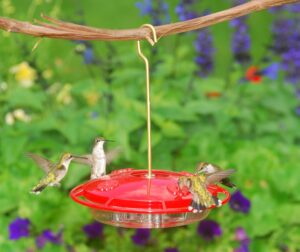
Making hummingbird nectar
Why Homemade Nectar is Best for Hummingbirds
Now that you know how to make hummingbird nectar, let’s explore why homemade is superior to store-bought options.
Benefits of DIY Nectar
-
Cost-effective: Making your own nectar is significantly cheaper than buying pre-made solutions. With just sugar and water, you can make large quantities of nectar for a fraction of the cost.
-
Control over ingredients: When you make your own nectar, you know exactly what’s going into it. There’s no risk of harmful additives or preservatives that might be present in commercial nectars.
-
Freshness guaranteed: Homemade nectar is always fresh. You can make it in small batches, ensuring that your hummingbirds always have the best quality nectar available.
-
Customizable: You can easily adjust the concentration of your nectar based on the season or the needs of your local hummingbird population.
Avoiding Harmful Additives
One of the biggest advantages of homemade nectar is the absence of harmful additives often found in commercial products.
Red dye, commonly used in store-bought nectars, has been a subject of concern among ornithologists and hummingbird enthusiasts. While there’s no conclusive evidence that red dye is harmful, many experts recommend avoiding it as a precautionary measure. Hummingbirds are attracted to the color red, but this can be achieved by using feeders with red components rather than adding dye to the nectar.
Preservatives are another common additive in commercial nectars. While these extend the shelf life of the product, they’re unnecessary in homemade nectar and could potentially be harmful to hummingbirds. By making your own nectar, you eliminate this risk entirely.
Proper Feeder Maintenance
Providing clean, fresh nectar is only part of the equation when it comes to attracting and caring for hummingbirds. Proper feeder maintenance is equally important. Let’s look at how to keep your feeders in top condition.
Cleaning Your Hummingbird Feeders
Regular cleaning is crucial to prevent the growth of harmful mold and bacteria. Here’s what you need to know:
-
Frequency of cleaning: In hot weather, clean your feeders every 2-3 days. In cooler weather, you can extend this to 4-5 days. However, if you notice any cloudiness in the nectar, clean the feeder immediately.
-
Recommended cleaning methods:
-
Disassemble the feeder completely.
-
Rinse with hot water to remove any nectar residue.
-
Use a mixture of 1 part white vinegar to 4 parts water for a thorough clean.
-
For stubborn spots, use a bottle brush or an old toothbrush.
-
Rinse thoroughly with clean water to remove all traces of vinegar.
-
Allow the feeder to air dry completely before refilling.
-
-
Safe cleaning products: Avoid using soap or detergents as they can leave residues that may be harmful to hummingbirds. Stick to hot water and vinegar for safe, effective cleaning.
- Here’s a comprehensive guide to help you clean your hummingbird feeder for those times when the nectar is not changed soon enough and mold starts to grow.
Here is a good video on how to clean a hummingbird feeder
Optimal Feeder Placement
Where you place your feeder can significantly impact its attractiveness to hummingbirds. Consider these factors: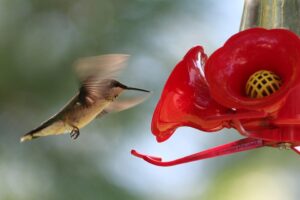
-
Visibility: Place feeders where hummingbirds can easily spot them. Near flowering plants or in open areas often works well.
-
Protection: Ensure the feeder is somewhat sheltered from strong winds and direct sunlight. Partial shade can help prevent the nectar from fermenting too quickly.
-
Safety: Position feeders at least 10-15 feet away from windows to prevent bird collisions. If this isn’t possible, place feeders very close to windows (within 3 feet) so that birds can’t build up enough speed to hurt themselves if they do fly into the glass.
-
Multiple locations: If you have a large garden, consider placing several feeders in different spots. This can help reduce competition among hummingbirds.
-
Consistency: Once you find a spot that works, keep your feeder there. Hummingbirds are creatures of habit and will return to the same locations year after year.
Remember, patience is key when setting up a new feeder. It may take some time for hummingbirds to discover it, but once they do, you’ll have regular visitors!
Where is a good place to hang a hummingbird feeder?
A good place to hang it is a shady spot, if you have one. Heat will make your nectar ferment quicker and have to be changed sooner, so a cooler spot in the shade is always good. You might also want to hang your feeder near a window, in a room where you spend a lot of time. That way you will be able to watch your feeder and more easily observe the hummingbirds. If you don’t have a good shady spot, that’s fine, you’ll just have to change the nectar a little sooner.
Here’s a great article that tells everything you need to know about how to choose the best place to hang your hummingbird feeder.
Window feeder for a close up viewing area
Experience the thrill of watching hummingbirds up close as they hover right outside your window. With a hummingbird window feeder!
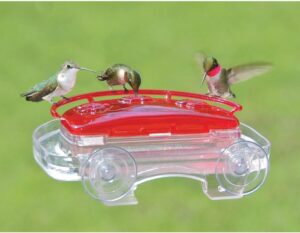
Having a hummingbird window feeder brings the excitement of nature right to your window. Imagine watching these vibrant, tiny birds hover just inches away as they sip nectar. Their iridescent feathers glisten in the light, and their rapid wing beats create a mesmerizing display you can enjoy from the comfort of your home. It’s a truly unique and personal experience, offering a front-row seat to nature’s most agile acrobats.
What makes a hummingbird window feedereven more thrilling is how often these fascinating creatures visit. You’ll get to see them return throughout the day, sometimes making multiple stops at your feeder. Each visit is a new opportunity to observe their graceful movements and learn more about these incredible birds. It’s like having your own live wildlife show right outside your window!
Beyond the joy of bird watching, a hummingbird window feeder adds a burst of color and life to your space. Whether you’re relaxing indoors or enjoying a cup of coffee, the sight of these dazzling creatures brings a touch of serenity and beauty to your day. It’s a simple, yet unforgettable way to connect with nature without leaving home.
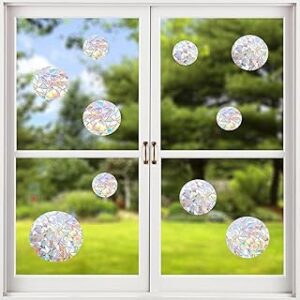
If you use a window feeder you will also want to use window stickers to prevent birds from crashing into the window.
Seasonal Considerations for Hummingbird Feeding
Hummingbirds’ feeding habits change with the seasons, and so should your feeding practices. Let’s explore how to adjust your approach throughout the year.
Spring and Summer Feeding
Spring marks the return of hummingbirds from their winter habitats. Here’s what you need to know:
-
When to put feeders out: In most areas, it’s best to put your feeders out by mid-March or when you typically see the first flowers blooming. This ensures food is available when the first migrants arrive.
- Here is a guide for when to start and when to stop feeding hummingbirds
-
Increasing nectar concentration: During spring migration, hummingbirds need extra energy. You can slightly increase the sugar concentration in your nectar to a 1:3 ratio (1 part sugar to 3 parts water) to provide this energy boost.
-
Frequent refills: In summer, hummingbirds are extremely active. Be prepared to refill your feeders more often, sometimes daily in areas with large hummingbird populations.
-
Maintain multiple feeders: This helps ensure all birds have access to nectar, especially when territorial males try to guard feeders.
Bully Hummingbirds! How to Reduce Aggression and Aggressive Males
Fall and Winter Feeding
As the weather cools, you might wonder whether to continue feeding hummingbirds. Here’s what you should consider:
-
Migration timing: In most areas, hummingbirds migrate south for the winter. However, some species in certain regions may stay year-round.
-
When to take feeders down: If you live in an area where hummingbirds migrate, keep your feeders up for about two weeks after you see the last hummingbird. This helps any late migrants that might pass through.
-
Winter feeding: If you live in an area with year-round hummingbird populations, continue feeding through the winter. Your feeder might be a crucial food source when natural nectar is scarce.
-
Preventing freezing: In cold climates, use strategies to prevent your nectar from freezing. This could include bringing feeders in at night, using feeder heaters, or alternating between two feeders.
Remember, feeding hummingbirds doesn’t prevent them from migrating. Their migration is triggered by changes in daylight length, not food availability.
Common Hummingbird Nectar Mistakes to Avoid
Even with the best intentions, it’s easy to make mistakes when feeding hummingbirds. Let’s look at some common errors and how to avoid them.
Recipe Errors
-
Incorrect sugar-to-water ratio: The standard ratio is 1 part sugar to 4 parts water. Using too much sugar can be harmful to hummingbirds, while too little won’t provide enough energy.
-
Using the wrong type of sugar: Always use plain, white granulated sugar. Brown sugar, honey, artificial sweeteners, or sugar substitutes can be harmful or even fatal to hummingbirds.
-
Adding red food coloring: This is unnecessary and potentially harmful. The red parts on your feeder are enough to attract hummingbirds.
-
Using hot nectar: Always allow your nectar to cool to room temperature before filling feeders. Hot nectar can warp plastic feeders and potentially harm birds.
Feeder Maintenance Issues
-
Letting nectar ferment: In hot weather, nectar can start to ferment in as little as 1-2 days. Fermented nectar is harmful to hummingbirds. Change your nectar frequently, especially during hot weather.
-
Not cleaning feeders regularly: Dirty feeders can harbor mold and harmful bacteria. Clean your feeders every time you refill them, using the method described earlier in this guide.
-
Using soap to clean feeders: Soap residue can be harmful to hummingbirds. Stick to hot water and vinegar for cleaning.
-
Refilling without emptying: Don’t top off old nectar with fresh nectar. Always empty the feeder completely, clean it, and then refill with fresh nectar.
-
Incorrect feeder placement: Placing feeders in direct sunlight can cause nectar to spoil quickly. Choose a spot with partial shade.
By avoiding these common mistakes, you’ll ensure that your hummingbird feeding practices are safe and beneficial for these delightful creatures.
Here’s a comprehensive guide to help you clean your hummingbird feederfor those times when the nectar is not changed soon enough and mold starts to grow.
Frequently Asked Questions
As you embark on your hummingbird feeding journey, you might have some questions. Here are answers to some of the most common queries:
How often should I change the nectar?
Answer: The frequency of nectar changes depends largely on the weather. In hot weather (80°F or above), change your nectar every 2-3 days. In cooler weather, you can extend this to 4-5 days. However, if you notice any cloudiness, discoloration, or black spots in the nectar, change it immediately regardless of how recently you filled the feeder. It’s always better to err on the side of caution and change the nectar more frequently to prevent fermentation and mold growth.
Guide for when to change the nectar
Letting the nectar ferment encourages mold growth, which makes the cleaning process more difficult. To avoid this, follow the chart below for recommended nectar changes based on the temperature. The hotter it gets, the more frequently you’ll need to replace the nectar.
High temperatures…………Change after
71-75……………………………6 days
76-80……………………………5 days
81-84……………………………4 days
85-88……………………………3 days
89-92……………………………2 days
93+………………………………change daily
Can I use brown sugar or honey instead of white sugar?
Answer: No, it’s crucial to stick to plain white granulated sugar. Brown sugar and honey can be harmful to hummingbirds for several reasons:
-
Different sugar composition: Brown sugar contains molasses, which hummingbirds can’t digest properly.
-
Potential contaminants: Honey may contain spores of a fungus that can cause a fatal tongue infection in hummingbirds.
-
Fermentation: Both brown sugar and honey ferment more quickly than white sugar solutions, which can be dangerous for hummingbirds.
-
Mineral content: These alternatives often contain minerals that, while beneficial for humans, can be harmful in large quantities to hummingbirds’ tiny bodies.
Always use plain, white granulated sugar for the safest and most beneficial nectar for hummingbirds.
Is it necessary to boil the water for hummingbird nectar?
Answer: While not always strictly necessary, boiling water for hummingbird nectar offers several benefits:
-
Better dissolution: Boiling water helps the sugar dissolve more quickly and completely, ensuring a consistent nectar solution.
-
Purification: Boiling can help eliminate any potential contaminants in the water, making the nectar safer for hummingbirds.
-
Longer shelf life: Nectar made with boiled water may last slightly longer before fermenting, though you should still change it regularly.
If you’re using tap water that’s safe for human consumption, boiling isn’t absolutely required. However, it’s a good practice that ensures the best quality nectar for your hummingbird visitors. Just remember to let the nectar cool completely before filling your feeders.
To Boil or Not to Boil Your Homemade Hummingbird Nectar? Here’s a comprehensive guide.
Will feeding hummingbirds make them dependent on my feeder?
Answer: No, feeding hummingbirds will not make them dependent on your feeder. Hummingbirds are naturally adapted to seek out multiple food sources. While they appreciate and will regularly visit reliable food sources like your feeder, they also consume insects for protein and nectar from a variety of flowers. Feeders simply supplement their natural diet, especially during times when flower nectar might be scarce. Hummingbirds will continue to forage naturally even with feeders available.
How can I attract more hummingbirds to my yard?
Answer: While feeders are a great start, there are several other ways to make your yard more attractive to hummingbirds:
-
Plant nectar-rich flowers: Hummingbirds love tubular flowers like trumpet honeysuckle, bee balm, and cardinal flower.
-
Provide water: A shallow, moving water source like a fountain or dripper can attract hummingbirds.
-
Offer perches: Thin, bare branches near your feeder give hummingbirds a place to rest and guard their food source.
-
Avoid pesticides: These can harm hummingbirds and reduce insect populations that hummingbirds rely on for protein.
-
Maintain multiple feeders: This reduces competition and attracts more birds.
-
Create shelter: Dense shrubs or trees provide safe spots for hummingbirds to rest and nest.
Remember, creating a hummingbird-friendly environment takes time, but the reward of regular hummingbird visits is well worth the effort!
Here’s a complete guide to attracting hummingbirds to your yard. It lists plants, vines and shrubs that are in bloom for spring, summer and fall. Your hummingbirds will always have flowers to feed on.
What kind of hummingbird feeder is best to use?
One of the best Hummingbird feeders that’s easy to take apart and clean is the HummZinger Ultra. It will also solve your bee and ant problems!
Aspects 12oz HummZinger Ultra With Nectar Guard.
The HummZinger Ultra 12oz Saucer Feeder is one of the best options for a hummingbird feeder that’s both easy to clean and maintain. This top-tier feeder features patented Nectar Guard tips—flexible membranes on the feeding ports that keep flying insects out while still allowing hummingbirds to feed freely. Plus, it comes with an integrated ant moat to prevent crawling insects from reaching the nectar, and the raised flower ports help divert rain, keeping the nectar fresh.
With a 12 oz capacity, this mid-size feeder offers plenty of space and can be hung or mounted on a post using the included hardware. It has four feeding ports and is made from durable, unbreakable polycarbonate. Whether you’re concerned about bees, wasps, or ants, this feeder is built for easy cleaning and insect protection.
Conclusion
Congratulations! You’re now equipped with all the knowledge you need to create the perfect homemade hummingbird nectar and maintain a welcoming environment for these fascinating creatures. By following this guide, you’re not only providing a safe and nutritious food source for hummingbirds but also creating an opportunity to observe some of nature’s most captivating performers up close.
Remember, the key points to successful hummingbird feeding are:
-
Use the right recipe: 1 part white granulated sugar to 4 parts water.
-
Keep it clean: Regular cleaning of feeders is crucial for the health of the birds.
-
Be consistent: Once you start feeding, try to maintain a reliable food source throughout the season.
-
Adapt to the seasons: Adjust your feeding practices as the weather changes and migration patterns shift.
-
Avoid common mistakes: Steer clear of harmful additives and maintain proper feeder hygiene.
Creating homemade hummingbird nectar is more than just a hobby; it’s a way to connect with nature and play a small but significant role in supporting your local ecosystem. As you watch these tiny, iridescent birds hover at your feeder, you’ll know that your efforts are making a real difference in their lives.
So, why wait? Gather your supplies, mix up your first batch of nectar, and get ready to welcome the delightful whir and chirp of hummingbirds to your outdoor
If you found this article helpful please share it with your friends using the social bookmarking buttons on the left side of this page. Help everyone to increase their knowledge and enjoyment of feeding hummingbirds. Do it for the hummingbirds! It also helps my ranking so my information will be available to more people. The more people that see this vital information, the more the hummingbirds are helped. Thank for your help. The hummingbirds and I appreciate you very much!
Other Hummingbird Resources
U.S. Fish and Wildlife Service – Hummingbird Conservation
This site offers detailed information about various hummingbird species, their habitats, and conservation efforts. It also provides resources on how to protect these fascinating birds.
National Park Service – Hummingbird Resources
The National Park Service offers insights into hummingbird species found in national parks, their behaviors, and their role in ecosystems, along with tips for observing them.